Screen 1 of 13
Welcome back
Screen 1
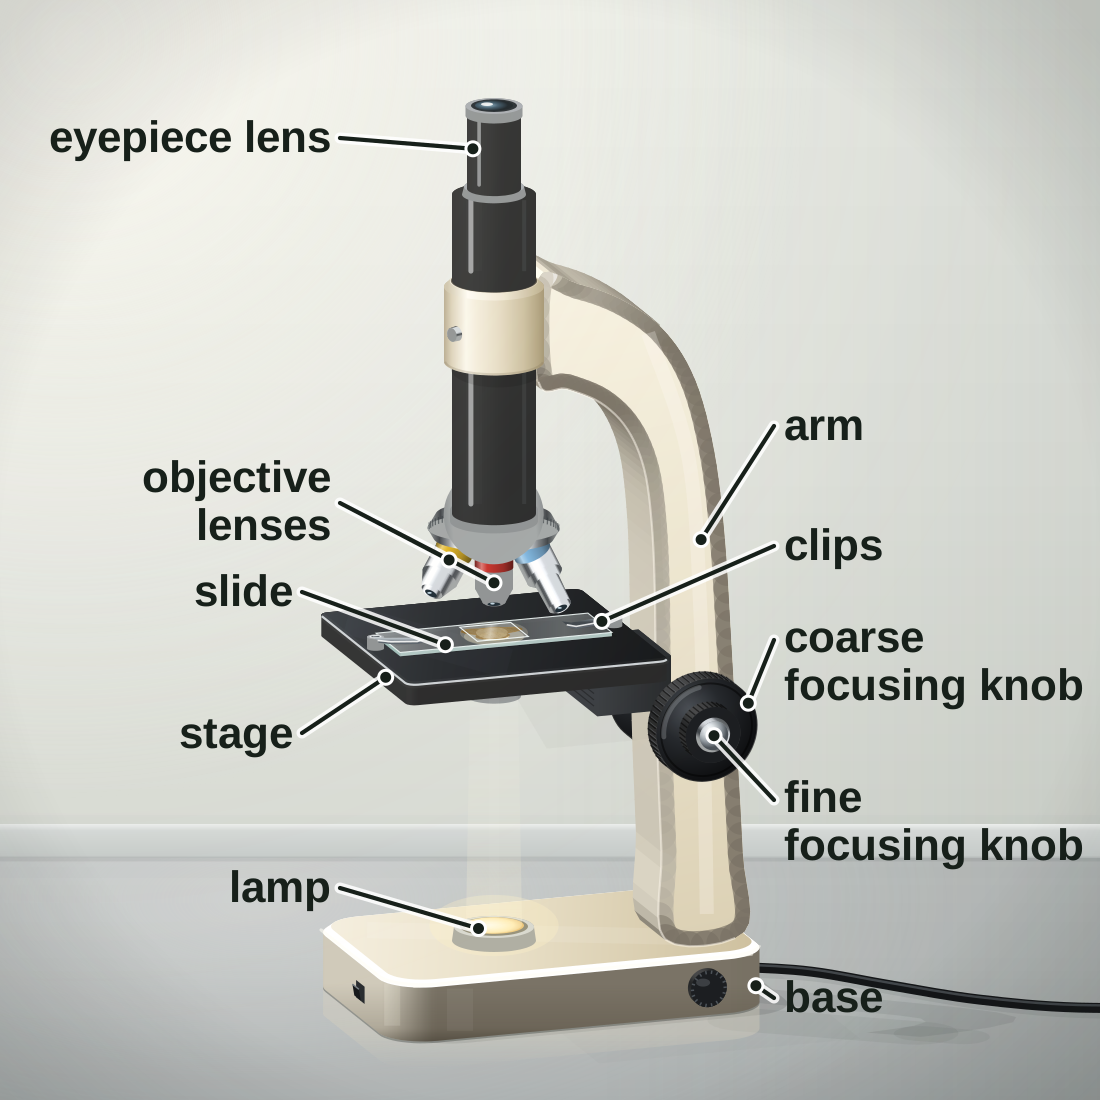
The light microscope
- A light microscope uses light and lenses to make a magnified image.
- The lamp shines light up through a thin specimen on the stage.
- Two lenses magnify it: the objective lens and the eyepiece lens.
Screen 2
A real microscope and a diagram
- A painting of a real school microscope, beside an exam diagram.
- An exam diagram shows only the parts you need to name, in the same places.
- Tap a difference to see it on both pictures.
Tap a difference to see it on both pictures.
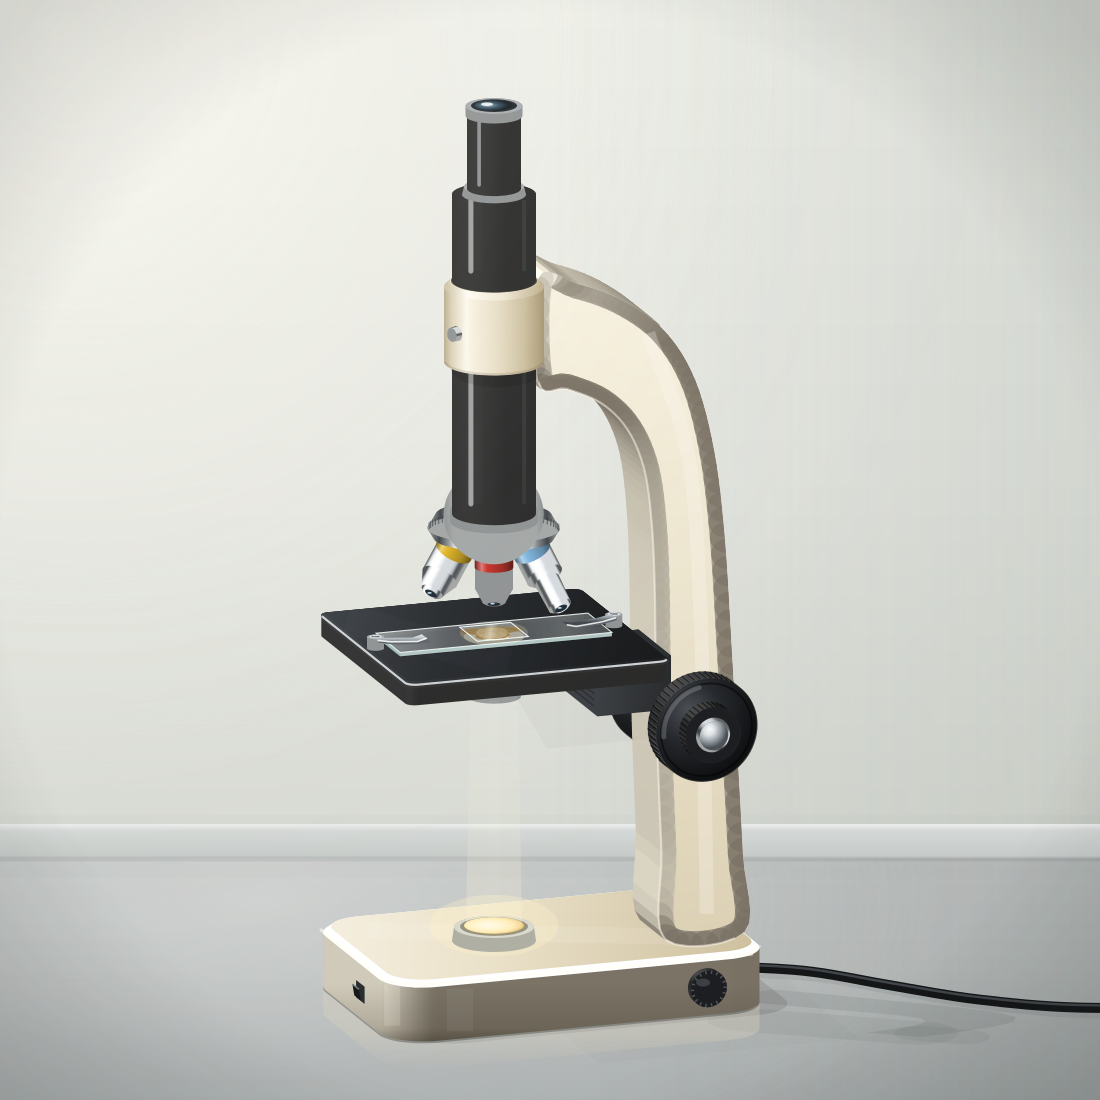
A real microscope
light from below
An exam diagram
light from below
Screen 3
Parts and their jobs
- Each part of a light microscope has a job. Tap a part to see it.
- Light goes from the lamp, up through the specimen, then through the objective lens and the eyepiece lens to your eye.
- The coarse and fine focusing knobs move the lens and the slide to focus the image.
Tap a part to see its job.
Screen 4
Total magnification
- Total magnification = eyepiece lens magnification × objective lens magnification.
- An eyepiece lens of × 10 and an objective lens of × 40: 10 × 40 = 400, so × 400.
- The higher the magnification, the smaller the field of view: you see fewer cells, but each looks bigger.
- To compare lenses, change the objective lens (independent variable) and measure the field of view (dependent variable).
Low power: a wide view. About 20 cells fit across. Start here to find the cells.
| Objective lens | Total magnification | Field of view | Onion cells across the view |
|---|---|---|---|
| × 4 | × 40 | about 4.0 mm | about 20 |
| × 10 | × 100 | about 1.6 mm | about 8 |
| × 40 | × 400 | about 0.4 mm | about 2 |
Multiply, never add: 10 × 40 = 400, so the total magnification is × 400.
Screen 5
Checkpoint 1 of 3
Quick check on screens 1 to 4. Tap an answer.
1.Why must the specimen on a microscope slide be thin?
2.Which part moves the lens and the slide a tiny distance, to make the image sharp?
3.The eyepiece lens is × 10 and the objective lens is × 40. What is the total magnification?
Screen 6
Preparing a slide
- Use a thin layer of onion epidermis (skin), so light can pass through it.
- Add a drop of iodine solution. It is a stain: it makes the cells, and parts such as the nucleus, easier to see.
- Lower the coverslip at an angle, so no air bubbles are trapped.
- Wear eye protection: iodine solution is an irritant.
Screen 7
Focusing step by step
- Start with the lowest-power objective lens.
- Watching from the side, turn the coarse focusing knob to bring the lens close to the slide, without touching it.
- Look through the eyepiece. Turn the coarse knob to move the lens and the slide apart until the cells appear. Make them sharp with the fine focusing knob.
- For a higher power, turn the nosepiece and use the fine knob only.
Screen 8
Onion and cheek cells
- Onion cells (iodine solution): brick-shaped, in rows, each with a cell wall and a nucleus. No chloroplasts.
- Cheek cells (methylene blue): flat and uneven, with a dark blue nucleus and no cell wall.
- You cannot see mitochondria clearly with a school light microscope. Ribosomes are far too small to see at all.
- An air bubble is round with a thick dark edge. It is not a cell.
Tap a part. Then switch to the other cells.
Try it yourself: the virtual lab for this required practical.
Screen 9
Checkpoint 2 of 3
Quick check on screens 6 to 8. Tap an answer.
1.Why is the coverslip lowered at an angle?
2.A student has found the cells with the × 10 objective lens. She turns to the × 40 objective lens. Which knob should she use now?
3.Among the onion cells, a student sees a round shape with a thick, dark edge. What is it?
Screen 10
Drawing what you see
- Use a sharp pencil and clear, single lines. No shading.
- Draw large. Label only what you can see.
- Draw label lines with a ruler: each touches its part, and no two lines cross.
- Add a title and the magnification (or a scale bar).
This drawing has five mistakes. Tap one to fix it.
Screen 11
Magnification and resolution
- Magnification: how many times bigger the image is than the real object.
- Resolution: the ability to see two points that are close together as two separate points.
- Making a blurry image bigger does not show more detail. Only a higher resolution does.
Low resolution: the two points blur into one.
Screen 12
Light and electron microscopes
- An electron microscope uses a beam of electrons instead of light.
- It has a much higher magnification and resolution, so it shows sub-cellular structures in much finer detail.
- Light microscopes date from the 1600s. Electron microscopes were built in the 1930s.
Light microscope: you can see the nucleus and the cytoplasm. Mitochondria are tiny blurry dots, and you cannot see ribosomes at all.
| Light microscope | Electron microscope | |
|---|---|---|
| Uses | light | a beam of electrons |
| Magnification | up to about × 1500 | up to about × 2 000 000 |
| Resolution | about 200 nm | about 0.2 nm |
| Shows | cells, nuclei, chloroplasts | ribosomes, the inside of mitochondria |
Screen 13
Checkpoint 3 of 3
Quick check on screens 10 to 12. Tap an answer.
1.Which of these is a rule for a biological drawing?
2.A student makes a blurry picture bigger on a screen. Why does she see no more detail?
3.Why can an electron microscope show ribosomes when a light microscope cannot?
Quiz
Quiz: B1 L3 Using a microscope
10 questions. Tap an answer. Your first answer counts towards your score.
Which two parts of a light microscope magnify the image?
A student uses a × 10 eyepiece lens and a × 10 objective lens. What is the total magnification?
A student has a × 15 eyepiece lens. She wants a total magnification of × 600. Which objective lens does she need?
A student changes from the × 10 objective lens to the × 40 objective lens. What happens to the field of view?
What does iodine solution do to the onion cells on a slide?
Why should you watch from the side while you bring the objective lens down towards the slide?
Which of these can you see in onion cells with a light microscope?
A student's drawing has shaded cells, a title, label lines drawn with a ruler, and the magnification. What should she change?
A light microscope has a resolution of about 200 nm. Two points in a cell are 50 nm apart. What would you see with a light microscope?
Which statement about electron microscopes is true?
Exam questions
The same 5 questions as the B1 L3 Exam questions worksheet. 20 marks.
Write your answer, then open the mark scheme and tick each point you made.
01Figure 1 shows a light microscope.
01.1Complete Figure 1.
Choose answers from the box.
01.2The eyepiece lens has a magnification of × 15.
The objective lens has a magnification of × 10.
Calculate the total magnification.
Use the equation:
total magnification = eyepiece lens magnification × objective lens magnification
Mark scheme
- (1)
- (1)
- (1)
- (1)
- (1)
01.1: 1 mark for each correct label. If more than one word from the box is written on one line, do not give that mark.
01.2: correct answer with no working = 2 marks. allow 150 without the × sign. do not accept 25 (the magnifications added): 0 marks. ignore a unit.
Model answer01.1 1 objective lens; 2 stage; 3 fine focusing knob. 01.2 15 × 10 = 150, so × 150.
02A student prepared a slide of onion cells.
These are the steps the student used, in the wrong order.
- PPeel a thin layer of epidermis from an onion with forceps.
- QLower a coverslip onto the specimen.
- RLay the epidermis flat in a drop of water on a slide.
- SAdd a drop of iodine solution.
02.1Write the letters P, Q, R and S in the correct order.
02.2Iodine solution is an irritant.
Give one safety precaution the student should take when using iodine solution.
Mark scheme
- (1)
- (1)
- (1)
02.1: all four in the correct order = 2 marks (tick both). two letters in the correct place = 1 mark.
02.2: allow wear gloves (it stains skin). allow wash splashes off (the skin) with (plenty of) water. ignore "be careful". ignore lab coat.
Model answer02.1 P, R, S, Q. 02.2 Wear eye protection.
03A student looked at cheek cells stained with methylene blue.
Figure 2 shows the student's drawing.
03.1Give two ways the student could improve the drawing.
03.2The student labelled a cell wall.
Give one reason why this label is wrong.
Mark scheme
03.1 any two from (max 2):
- (1)
- (1)
- (1)
- (1)
- (1)
- (1)
03.2
- (1)
03.1: 1 mark for each different way, max 2. ignore "remove the cell wall label" (tested in 03.2). ignore "draw it bigger".
03.2: allow "animal cells have no cell wall". allow "only plant (and algal) cells have a cell wall". do not accept "you cannot see the cell wall" on its own.
Model answer03.1 Do not shade; draw the label lines with a ruler, and do not let them cross. 03.2 Cheek cells are animal cells, so they have no cell wall: the outline is the cell membrane.
04Table 1 compares a light microscope and an electron microscope.
| Light microscope | Electron microscope | |
|---|---|---|
| What it uses | light | a beam of electrons |
| Maximum magnification | about × 1500 | about × 2 000 000 |
| Resolution | about 200 nm | about 0.2 nm |
04.1Which structure can be seen with an electron microscope but not with a light microscope?
Tick (✓) one box.
04.2Electron microscopes were first built in the 1930s.
Explain how electron microscopes have helped biologists to learn more about the structure of cells.
Use Table 1.
Mark scheme
- (1)
- (1)
- (1)
04.1: if more than one box is ticked, give 0 marks.
04.2: allow "higher magnification and resolution" for the first mark; "higher magnification" alone does not score the first mark. allow a named example for the second mark, such as ribosomes / the inside of a mitochondrion. allow use of data, such as 0.2 nm compared with 200 nm, for the first mark.
Model answer04.1 Ribosome. 04.2 Electron microscopes have a much higher resolution than light microscopes (0.2 nm, not 200 nm). So biologists can see sub-cellular structures, such as ribosomes, in much finer detail.
05A student has a prepared slide of onion cells.
Describe how the student should use a light microscope to see the cells clearly at high power, and then make a labelled drawing of what they see.
Mark scheme
Level of response. Read your answer, choose the level that fits best, then pick your mark.
| Level | Marks | Descriptor |
|---|---|---|
| 3 | 5–6 | A detailed, logical description of how to focus at low power then at high power, in a sensible order (lowest-power objective first; coarse focusing knob, then fine; fine knob only at high power) and of a good drawing, including at least two drawing rules and the magnification or a scale bar. |
| 2 | 3–4 | A description with some detail of focusing and of drawing. The order may not be fully clear, or the drawing is described with only one rule. |
| 1 | 1–2 | Simple statements, for example "focus it" or "draw the cells", with little detail. |
| 0 | 0 | No relevant content. |
Indicative content
- clip the slide onto the stage, with the specimen over the hole; switch on the lamp
- start with the lowest-power objective lens
- watch from the side and turn the coarse focusing knob to bring the lens close to the slide (without touching it)
- look through the eyepiece lens and turn the coarse focusing knob to move the lens and the slide apart until the cells appear
- turn the fine focusing knob until the image is sharp
- turn the nosepiece to a higher-power objective lens
- refocus with the fine focusing knob only (the coarse knob could crack the slide)
- draw with a sharp pencil, using clear, single lines and no shading
- draw label lines with a ruler; they do not cross
- label only what can be seen, such as the cell wall, the cytoplasm and the nucleus
- add a title and the magnification (eyepiece × objective, such as × 400) or a scale bar
- do not accept "use the coarse focusing knob at high power" (that point scores nothing; others still score)
Your mark:
Model answer (Level 3)Clip the slide onto the stage with the cells over the hole, and switch on the lamp. Start with the lowest-power objective lens. Watching from the side, turn the coarse focusing knob to bring the lens close to the slide without touching it. Then look through the eyepiece lens and turn the coarse knob to move the lens and the slide apart until the cells appear. Make the image sharp with the fine focusing knob. Turn the nosepiece to a higher-power objective lens and refocus using only the fine focusing knob. Draw the cells with a sharp pencil, using clear, single lines and no shading. Label the cell wall, the cytoplasm and the nucleus with ruled lines that do not cross. Add a title and the magnification, such as × 400.
Total: 0 out of 20
Printable copy: the B1 L3 Exam questions worksheet and its mark scheme (PDF) are in Downloads.
Downloads
- PPTXB1 L3 PowerPointLesson with checkpoints, revision notes, all worksheets and answers in green. 12.9 MB.
- PDFB1 L3 Revision notes4 printable pages, 0.9 MB.
- PDFB1 L3 Mandatory worksheetThe main worksheet (Foundation). 2 pages, 0.2 MB.
- PDFB1 L3 Challenge worksheetHarder questions. 2 pages, 0.1 MB.
- PDFB1 L3 Alternative worksheetKey notes and simpler tasks. 2 pages, 0.3 MB.
- PDFB1 L3 Exam questionsExam-style, black and white, 5 questions, 20 marks: the same questions as the online exam questions. 4 pages, 82 KB.
- PDFB1 L3 Exam questions mark schemeThe mark scheme for the exam questions. 2 pages, 47 KB.
Worksheet answers are in the PowerPoint, in green, after each worksheet.